
The method of Windows repair placed in the headline of this article has already been mentioned here a year and a half ago. I did not plan a detailed description, but since then it's been discovered that many site visitors have very vague idea about it. For example, after the recommendation to make a "reinstall on top of the existing one", the discussion participant supposed that "it is something from the times of Win 98/ME". As for me, I consider this technique extremely effective and have been often using it in my practice to recover normal functionality of Windows from XP to 8.1 inclusive. So after all I decided to describe the process in full details.
Despite the fact that at the time of writing many computer owners are still have been using Windows XP, I see no point in writing manuals on this cool but old-fashioned OS. (Vista is out of context at all and is suitable only as a donor of some useful applications that are disabled in newer versions.) At the moment, I continue to use Windows 7 on most home computers, including the main one. Microsoft managed to make Win7 so well, that the doubtful benefits of later versions in the form of Metro interface, App Store and Microsoft account do not really stimulate to pass to them. I consider Win7 the best OS for PC at the moment, and quite long-playing. Therefore I will start with it. However, similar instructions for 8.1 and/or 10 are also planned.
So what is the described "reinstallation on top"? LetŌĆÖs keep in mind we are not talking about upgrading earlier version of Windows to the later ones. We are considering installing the same version over already installed one - repair installation. This method keeps everything (well, to be exact - the majority) of installed programs, drivers and settings. System core at that is being restored in its initial shape and all system bugs accumulated since previous installation are being repaired. It is necessary to keep in mind some features which will be described later. So first letŌĆÖs talk about requirements and conditions needed to start the process.
Requirements
- System is working with bugs but still loading. Unlikely from WinXP, where it was possible to reinstall the system by loading from installation disk, in Seven this option does not exist. In other words if the system canŌĆÖt be start this method wonŌĆÖt work. In this case you can try to force the OS boot up using System Repair Disc; and if this wonŌĆÖt work ether - to roll up to the restore point or try other methods including full reinstallation.
- Time. The process is long and can take up to a few hours depending on the hardware. If you are limited with time donŌĆÖt read any further and move on to the quicker methods of solving your problem.
- Distributive availability - I mean installation disk or flash drive. Of course, distributive must be compatible by bit capacity, edition, language and service pack (SP) availability. If you are not sure have a look at the system information section; how to get there? ŌĆō here is the instruction How to determine whether my PC is running Windows 7 of 32 bit or 64 bit. You can find info regarding capacity only thought and the rest is in the section Windows edition. And if it is clear about edition there is one thing about service pack. Microsoft issued only one update pack for Windows 7 - SP1, and most probably that is what installed in your system. But sometimes reinstallation on top of distributive not including SP1. After reinstallation service pack was always installed in a proper way both via manual work or Windows service centre.
- This is not even a requirement but rather a list of small losses going along with the process. After its implementation you lose all or part of installed updates. If your distributive includes SP1 and/or part of updates for the period of its issue, they will be restored in the updated system. Everything else will need to be reinstalled from scratch. Not a big deal but keep in mind. Also, additional language packs will be lost. And the main thing ŌĆō activation will be lost so you will have to reactivate the system.
Where to get distributive
Microsoft is continuously changing the policy on supplying users with ISO-image of installation DVD. But creative geeks assemble custom distributives which include all editions, capacities, SP1 and updates. Some assemblies contain all those versions for multiple languages. Also often activation is included. I am not telling you to break the law and Microsoft copyright; just keep in mind that this is the most convenient and universal option. This assembly can be saved on one DVD. You can reinstall the system using this DVD and reactivate it with your licenced product key (which you are sure to have) and remain the owner of licenced OS. I will also not tell you where you can download such an assembly. It is an open secret for everybody. By the way you can also find official RTM-distributives for most editions of Windows 7 there as well.
So, you got installation DVD, or downloaded the image and transferred it to the disk or flash drive. LetŌĆÖs go!
Installation process
- Insert DVD or connect flash drive. If autorun is off run
setup.exefrom the root of distributive. The window Install Windows pops up.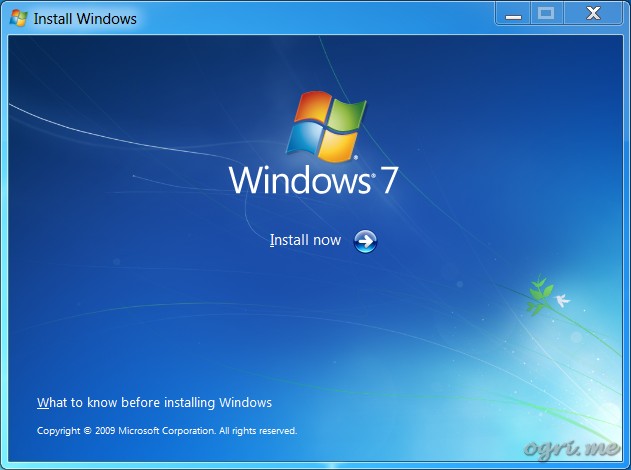
Click Install now. The process is being activated and after copying temporary files we see the next dialogue.
- Get important updates for installation.

If Microsoft states that it is important ŌĆō it is important! From my experience though updates for installation never affected further process. But if you decide to have them next window will be:
- Searching for installation updates.

Then after a little wait we get to the next:
- Please read the license terms.
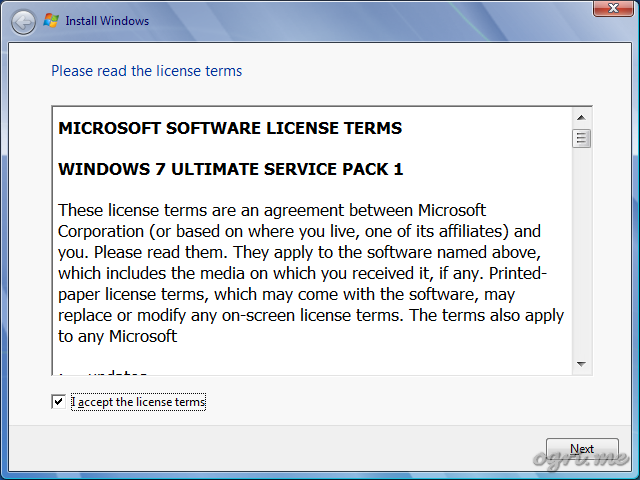
No doubt you'll carefully read the whole agreement, right? Then mark the check box and click Next.
- Which type of installation do you want? Here - attention! Do not accidentally click on full installation or you will get completely clean system!
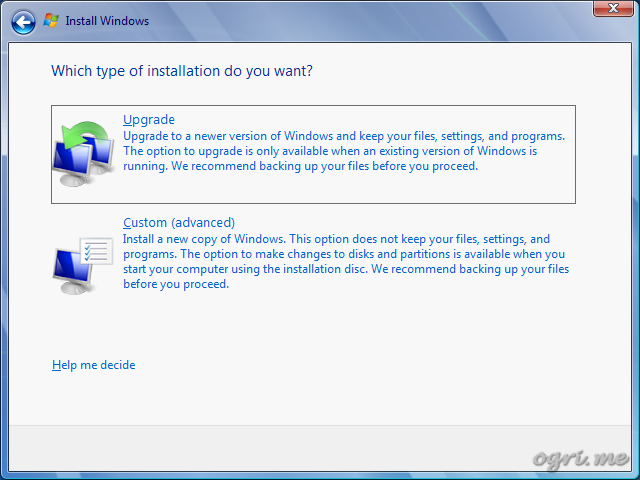
Click on the first item - Upgrade.
- Checking compatibility.

Now we will find out if the system allows to be updated.
- Compatibility Report. This one is the best:
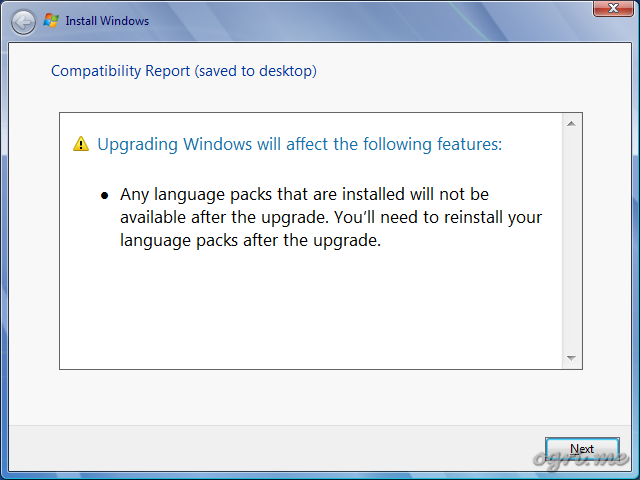
As I mentioned earlier, language packs will be lost after repair installation. Also sometimes you can see info about some devices and applications which might stop working after system upgrading. Probably those are the programs that work in compatibility mode with older versions of Windows. In my practice I ran across such notifications but I never had to reinstall anything ŌĆō all drivers and applications remained working well after the upgrade. But please keep this in mind. This report will be saved on desktop and after reinstallation can help to figure out what went wrong in case some devices and applications fail.
Click Next - and the process is on!
- Upgrading Windows.

Further everything will be as during usual installation with the only difference: the stages of saving and recovering programs and settings will be added to the process. During the process your computer will be rebooting. Also the process might take up to several hours. Based on my experience - one hour or one hour and a half maximum. In any case you can relax before your next step and watch your favourite TV Show.
The screen when you need to do your next action ŌĆō Set Up Windows.
- Type your Windows product key.

As in case of initial installation, entering in the key and activation can be postponed by clicking Skip. Later you can choose different activation methods depending on key label availability - "included with the package that came with your copy of Windows" or "on your computer case". If yes, you can enter the key at this step and click Next.
- Standard steps of system set up - parameters of setting up updates, date and time, network. All those things are set up from the initial system settings so I will not go into details here. You can confirm default settings in each dialogue. The set up process is finished with messages about applying parameters and preparing desktop. And then the system starts at last.
- First start of the upgraded system. After you see the usual desktop with all your shortcuts, files and folders, installer is still working and it will take a while until the final step of set-ups is complete. Also probably the last version of .NET Framework will be recovered and you will see the message:
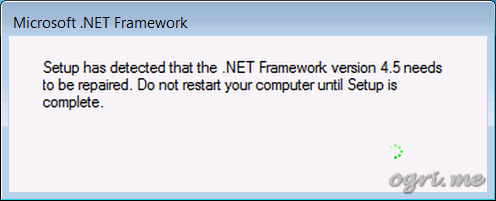
After finishing the last installation step you will be offered to restart your computer and you will do so. Then your bug-free OS will be ready to use. You will only need to reinstall updates, restore language packs (if they were) and activate the system if you have not done so on Step 9.
-
Saturday, 10 February 2018 18:48
Implementation of Windows Mail into Windows 10 version 1709. MAPI restored! -
Tuesday, 02 January 2018 16:40
Implementation of Windows Mail into Windows 10 version 1709 -
Friday, 18 November 2016 19:14
Reinstall Windows 10 without losing programs and files (Repair install) -
Thursday, 16 April 2015 19:17
Reinstall Windows 7 without losing programs and files (Repair install) -
Wednesday, 07 May 2014 14:08
Enabling Windows Mail in Windows 7 - retrospective review three years later
-
Implementation of Windows Mail into Windows 10 version 1709
-
 05.04.2020 16:16
Sehr geehrte Damen und Herren, das Problem, das ich in meiner Mail vom 03.04.2020 dargestellt habe, ist ...
05.04.2020 16:16
Sehr geehrte Damen und Herren, das Problem, das ich in meiner Mail vom 03.04.2020 dargestellt habe, ist ...
-
03.04.2020 09:06
Sehr geehrte Damen und Herren, gro├¤artig, dass Sie eine L├Čsung anbieten, mit der ŌĆ×Windows MailŌĆ£ ...
-
-
Implementation of Windows Mail into Windows 10 version 1709. MAPI restored!
-
 15.05.2021 16:31
schick mir ne Mail, auf wolframjahn at t- .... meine Antwort war wohl zu gro├¤, wurde immer als ...
15.05.2021 16:31
schick mir ne Mail, auf wolframjahn at t- .... meine Antwort war wohl zu gro├¤, wurde immer als ...
-
 04.02.2021 09:57
Are the zip archives no longer available? I can't download anything.
04.02.2021 09:57
Are the zip archives no longer available? I can't download anything.
-
 13.01.2021 17:32
Ok I think I fixed it I followed this, but instead of adding to WLM which i don't have i added them into ...
13.01.2021 17:32
Ok I think I fixed it I followed this, but instead of adding to WLM which i don't have i added them into ...
-
13.01.2021 17:20
This is the error It doesn't seem to be able to send or receive emails An unknown error has occurred.
-
13.01.2021 17:19
This is the error It doesn't seem to be able to send or receive emails An unknown error has occurred.
-
13.01.2021 12:22
Hi, Does this work with the latest update of windows 10 I'm having a few issues now since updating ...
-
 02.07.2020 12:35
Hi. I need assistance with step 5 "Copy all files from the SysWOW64 in the archive to the folder ...
02.07.2020 12:35
Hi. I need assistance with step 5 "Copy all files from the SysWOW64 in the archive to the folder ...
-
 01.02.2020 02:08
Thank you for restoring Winmail.
01.02.2020 02:08
Thank you for restoring Winmail.
-
Comments